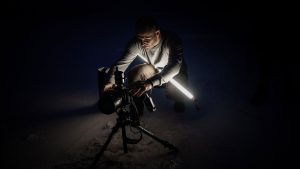
Beginners Guide to Light Painting
Complete Beginner’s Guide to Light Painting in Photography
Picasso wasn’t just born a genius with a brush – he had guidance. If you want to learn to paint with light, this is the most comprehensive Beginners Guide to Light Painting. Light Painting is a unique photographic technique that, at first glance, looks like it takes an expert to create. But it doesn’t! You’ll be surprised at how simple this technique can be and how fast you can start getting your first images.
Light Painting photography has been around since the dawn of photography, and over the past few years, it has seen a surge of interest from both enthusiasts and professional photographers.
This blog article will take you through the basics of light painting and give you tips, tricks, and techniques on how to get cool light painting photos. You will find plenty of inspiration and links to deepen your knowledge if your thirst is not satisfied just yet.
The video section will also help you to get more visual on the topic.
Before you begin remember the most important thing. You should have fun sharing this adventure.
Why I kept light painting I describe in my article: “How I came to Love Light Painting”
What is Light Painting Photography?
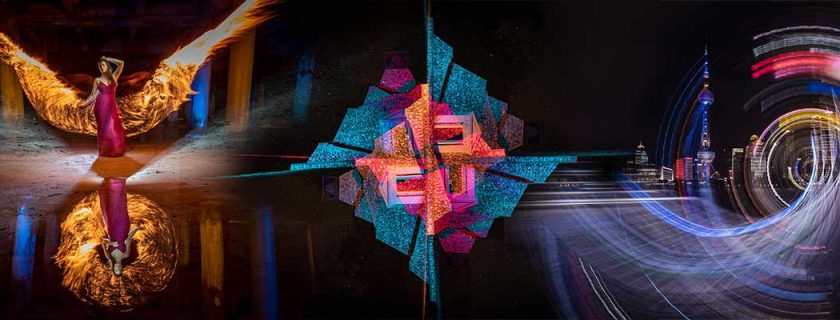
Light painting is a photographic procedure that takes long exposures of the subject using moving light sources or the camera moves. The camera’s shutter speed is extended to allow long-exposure for imagery to be composed over a longer period. For me, Light Painting was more than just pushing the button and accepting the outcome. I started engineering the images just using some sparklers or the phone. During a long exposure, it is up to me or you to influence the outcome while the shutter is open. What excites me is that every result is unique and special in its way. Beauty and taste is as always in the eye of the beholder.
It’s also known as Light Art, LAPP, or Light Graffiti by some. In summary, it means moving a light source with modified camera settings along an exposure path. There are many kinds of light painting: light painting a subject and light painting your environment, light drawing, etc. pp. We don’t need too many labels to start having fun.

Ways of Light Painting
There are many different types of light sources for light painting as there are ways to achieve the same result. You will need to find your own ways and your style as you go. Do not hesitate to just try and play. The age of digital photography provides you with an experiment so much easier and 1000 times faster than during analog times. You can see the result of your work eminently. The age of instant gratification.

On-Camera Light
When a light source is captured on-camera, it indicates the source of the light is a visible object. This technique involves “painting” with a light source while standing within the image’s set frame. If you use this strategy, it’s a good idea to dress in dark clothing so that you don’t show up in the photograph. Unless you want to become your own very unique Watermark (think about that).
Kinetic Light Painting
You’ll be moving the camera rather than the light source with kinetic light painting. For example, you may make a candlelight painting by using the candle’s light and moving the camera, but not moving the candle itself. Panning or circling all belong in that category.

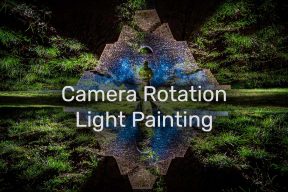
Another example here would be Camera Rotation as a specialization in Light Painting Photography
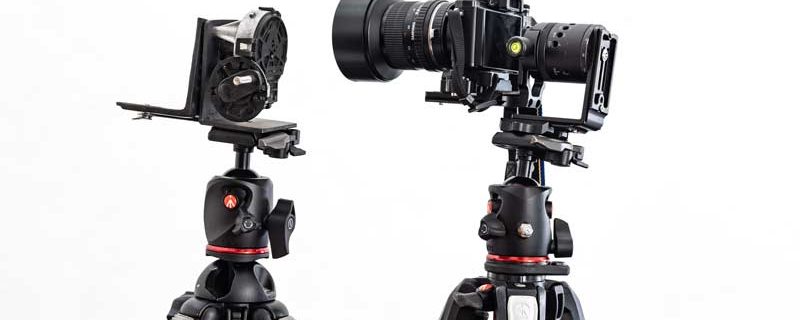
It also belongs into the category of Kinetic Light Painting. Camera Rotation is exactly what you think it is. During the exposure time, the camera rotates on a tripod or any device needed. The lens can stay open during the rotation, then you’ll see some light trails. If the lens is open only at some points or times – you may see the same scene just in different lights.
Over the past years, this technique has become one of my favorites to combine with the more traditional approaches. Many times it lets the mind wander and ask oneself, how did that happen. The Kinetic aspect changes everything.
Light painting Hybrids – Mix Technuiques!
Of course, as you progress and start playing you figure out that you can combine anything you want. The world is an oyster. You can use drones for instance as the camera takes the image yet it moves (kinetic Light Painting) or standing still (On-Camera) or even the drone as a light source and do a camera rotation while doing both. Or you just combine all of that. Go crazy!
The Equipment for Light Painting Photographs | Light Painting Tools
What will I need to get started? Tools are the very first thing that has to be on your mind when you think of taking pictures of light painting. After all, it is not only the light that paints pictures, but also the equipment and how you use them. If you want to take your light painting to the next level, then these are must-have light painting tools.
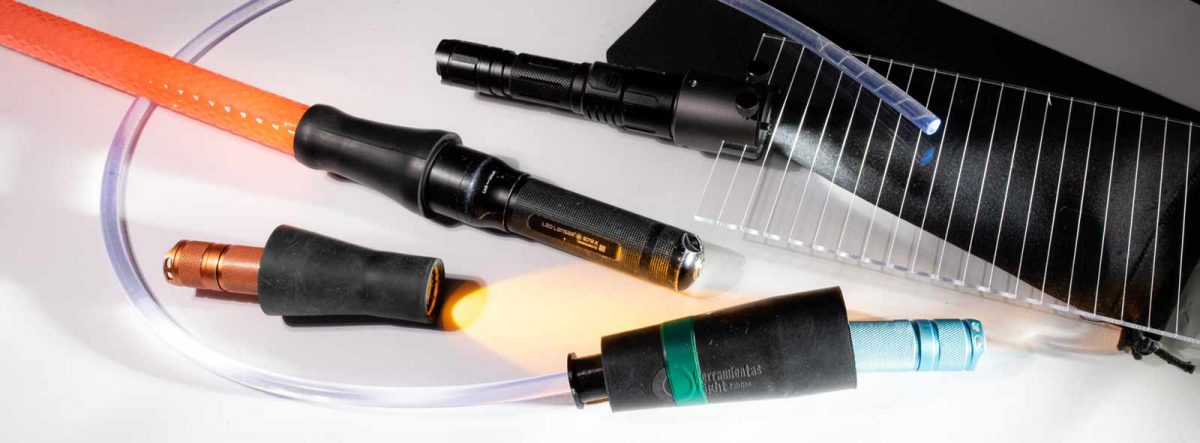
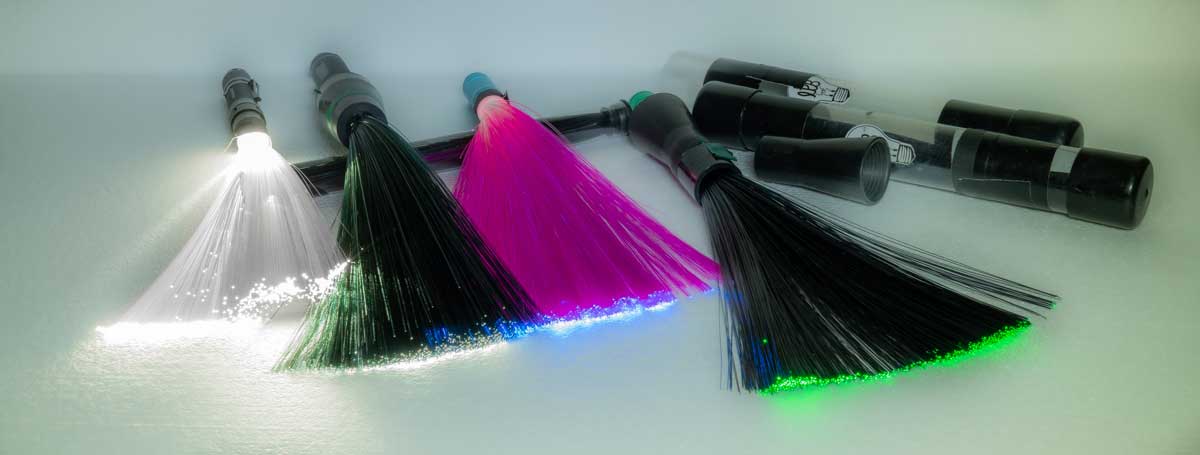
Start simple and only with the necessary. Don’t think about getting complex light painting tools, like fiber brush or rotation head or any acrylic blades just yet. The might look tempting but please don’t rush off and spend a lot of money on it just yet. It will come soon enough, but only if you like it very much.

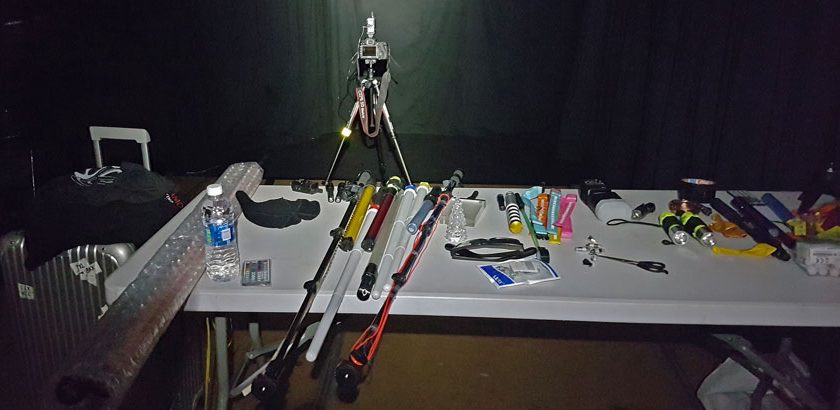
What you see above are called Fiber optic brushes or whips. Some of you may already know it’s one of my favorite light tools out there. If you are particularly interested in that technique please follow the link. Below you see some example portraits.
Light Sources for Photography
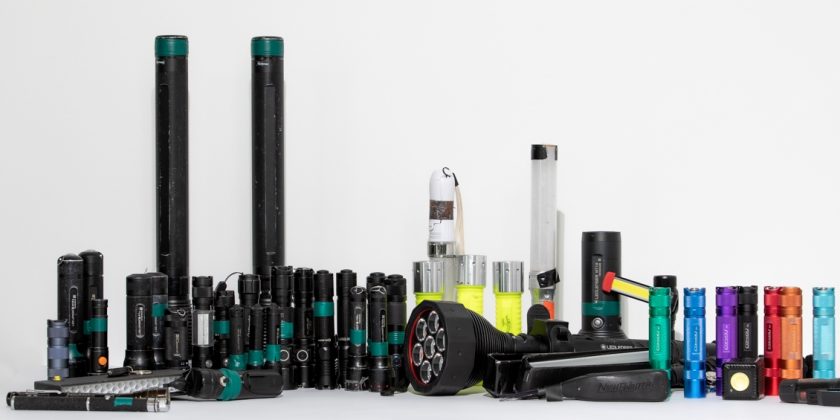
For light painting, you may use almost any tool as a light source, but each one will have a distinct impact. Light painting brushes, flashlights, lasers, glow sticks, strobe lights, candles, LED lights, and string lights are all common light sources for light painting.
Experiment with various light sources to find which ones produce the greatest results for your desired effect.
Once you get started you’ll always have a flashlight in your pocket and you shed light on or into anything you see. If you have kids, storm their toy arsenal and see what looks cool when you illuminate it. If you have friends with kids, go have a conspiratorial dinner visit and say you need to go toilet but go to the toy stash and check what they have. You would never purchase a lightsaber but it could do incredible Light Painting magic.
What Camera or Lens do you want to use?
Most of the time I would say to try the technique you can use anything that has a BULB mode for you to play with.
A decent DSLR camera is certainly needed for light photography when the dynamic range becomes important. However, you also need to be aware of how to manipulate the camera’s exposure settings in order to get the best results, when shooting in raw.
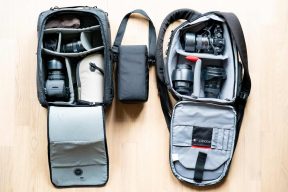
Carrying a camera bag, strap, lens cleaner, and other accessories are critical for any kind of photography, including light photography. Take all the preparations that a professional photographer does, even if you’re not planning to do this for commercial purposes.
I have been working with all sorts of brands like Nikon, Sony, and Olympus. Yet I found myself always coming back to Canon. But please that’s a personal choice and preference. Don’t make that stop you.
Add a few little helpers into your bag:
How often I had these Carrying a camera bag, strap, lens cleaner, and other accessories is critical for any kind of photography, including light photography. Take all the preparations that a professional photographer does, even if you’re not planning to do this for commercial purposes. Especially when you are working with relatively high F-Stops you may end up with some spots from the lens or the sensor dust. Check before you leave but when you forget it’s nice to have it with you. So simple!
Lenses
Of course, you have some kind of camera and a lens, and what you have, is what you have. You can use pretty much anything for light painting there is out there and get fantastic results. So before you chose the lens for your shoot you will need to buy it. If you are lucky and you can just purchase any Lens you could possibly want, I suggest going to DXO-MARK and choosing first by your desired Sharpness, Distortion, Vignetting, Transmission, or Aberration. Anything goes. Just start playing.
Again there is an entire article on that too. Find out about lenses for Light Painting here.
Lens Capping
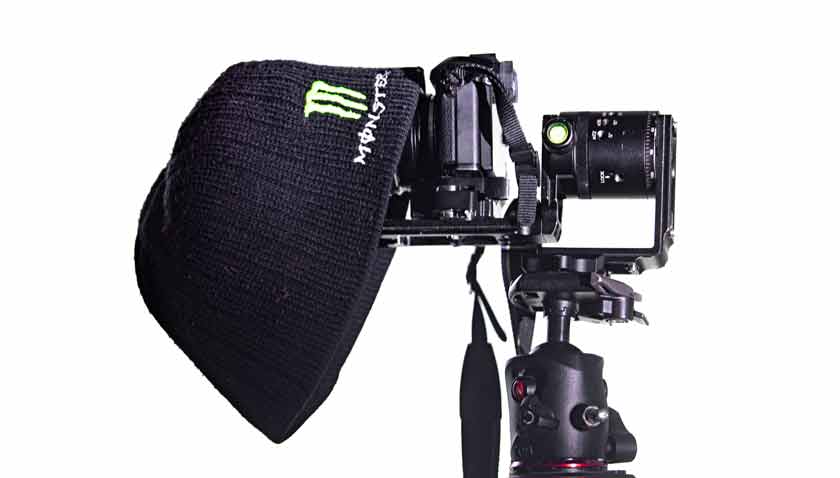
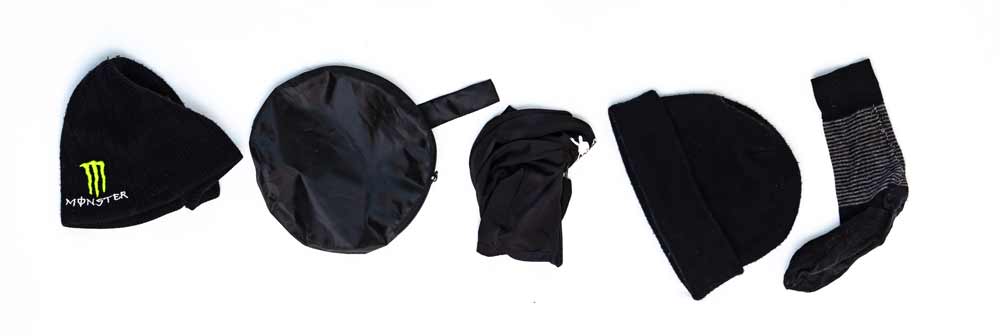
Your camera sits on the tripod and you are in the middle of the exposure. Now you really need to move from A to B in the darkness. To be safe you will have a friend/assistant that will cover the lens while you turn on your headlamp and move around safely. To cover the lens Light Painters use almost anything when they forgot their hoodie. Here are some examples.
Important here is mostly that you cover the entire lens (if needed) and that while you do it not add any unwanted effects; for that use something non-reflective = matt black.
Tripod Stand
Because your shutter is open for such a long period in a long exposure shot, any movement, no matter how minor, might result in a blurry image. The blurs you create with your light source are desirable in light painting. Camera shaking, on the other hand, will cause a hazy image.
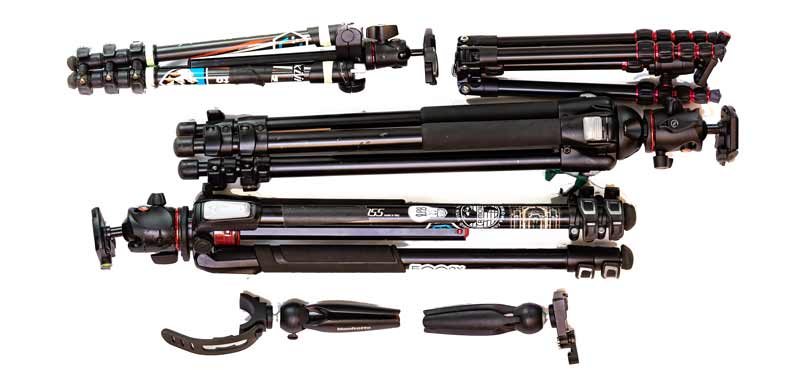
Make sure you have a strong, stable tripod to prevent camera shaking. The only time you don’t need a tripod is if you’re performing kinetic light painting. There are many things to consider, besides solid stand for me is also weight very important when I travel. So I do have many different tripods. Gear accumulation syndrome, I would say.
Wireless Shutter Release – Remote control
Even the tiniest movement might cause the image to blur when using a long shutter speed. You should avoid touching your camera or tripod unless you’re doing a kinetic light painting. The safest, cheapest, and easiest is a cable-based remote trigger. It does not take batteries and will always work. Anything with batteries is a potential fail because it’s cold and the batteries are dead. Have a backup.
You can choose a camera with a built-in wireless shutter release. You can take a picture without touching your camera with these tools!
Some cameras allow you to use a remote app to trigger. If you do that keep in mind that there will be a slide delay in reaction time from pushing the button to actual release or stop trigger. Also, the automatic phone display switch-off should be deactivated. Otherwise, you sit there and need to wake up your phone to stop the trigger on your camera.
There are many different remote controls triggers for all the different cameras. Check out Amazon or your nearest camera dealer to help you out with what works for Light Painting.
If you have limitations on investing in a wireless shutter release, you can use your camera’s timer feature instead.
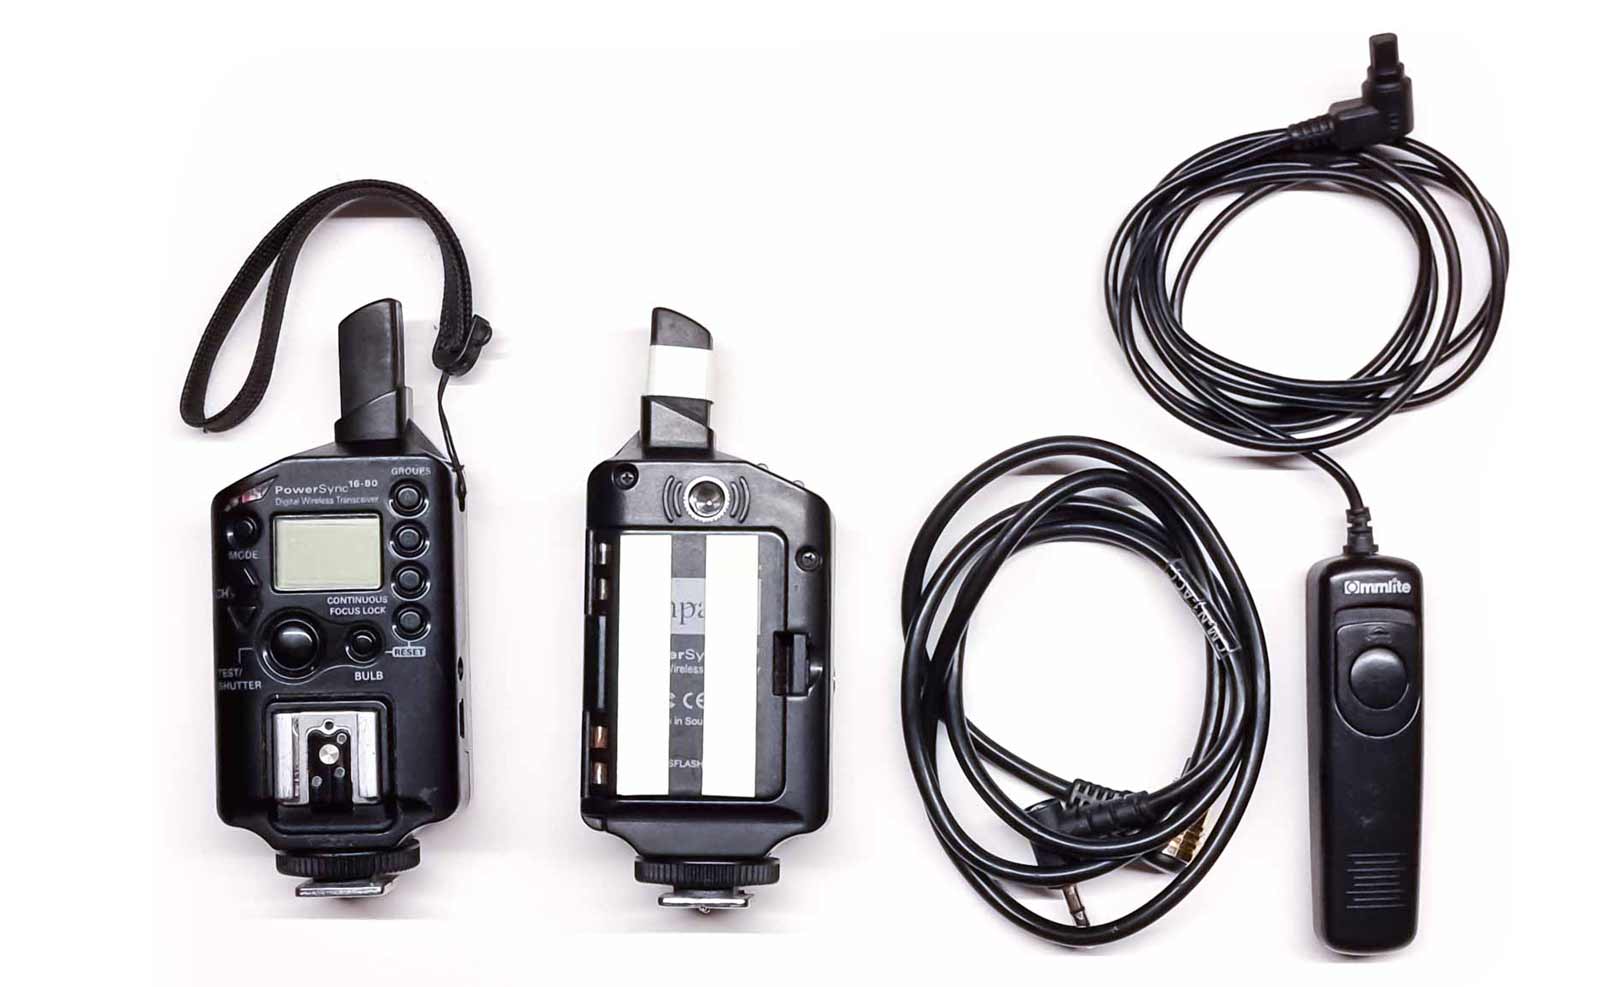
What I do?
Many times I don’t even like to attach a remote trigger anymore. A sliding touch of the display lets me start and stop my exposure on my Camera. But I do have always the wireless remote triggers that you see here. These are certainly expensive but have not let me down when I really needed them. The Cable version is always my last resort. What if the Batteries die on me = then I do have the cable. Often I lend it to some friend who forgot to bring one.
Head Lamps
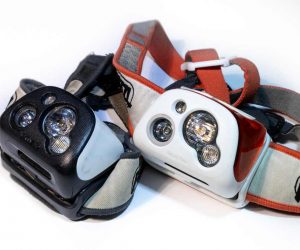
If you move around at night have a headlamp. Just getting from the car to the place you want to shoot or moving around while you take a light painting, make sure when you move around in the dark that you have a headlamp of some sort.
I use the one from Petzl because they also have a red lamp function which is useful when you move around in tropical areas. Mosquitos will not attack so much when you have only red light on.
Use a Stopwatch or a Friend calling out the seconds past
When light painting, a stopwatch might come in extremely handy, especially if you’re manipulating the light sources alone. You’ll need to leave your shutter open for as long as you need to finish your light painting. But calculating all the seconds in your brain whilst moving the light can be tricky. A solution is to time your motions with a stopwatch, then adjust your shutter speed or movement speed as needed.
So in practice, you will then remember. 1. First I needed five seconds to illuminate the background 2. Then two seconds for the model

Light Painting Fashion – Non-Reflective Clothes
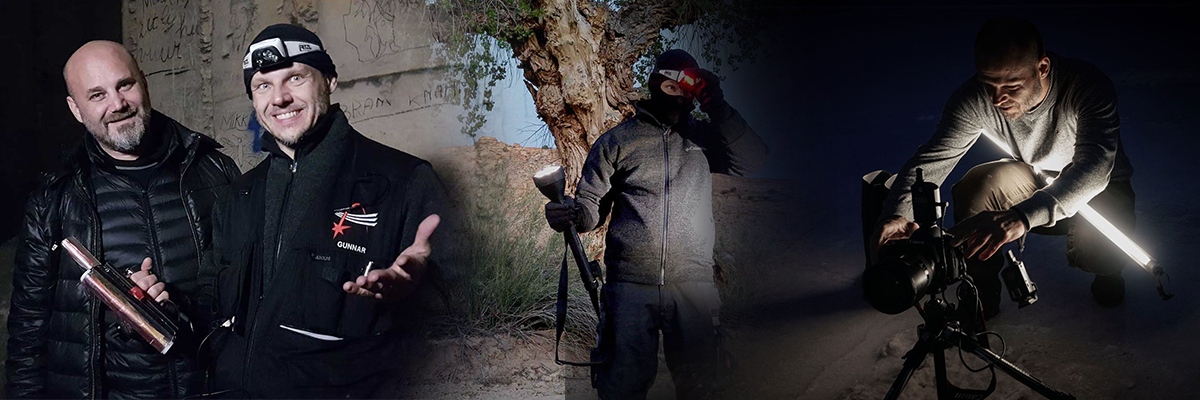
Since you and/or the subjects in the photography will be surrounded by lights, reflective clothing can cause significant light leaks. These leaks are caused by the reflections from the clothing, which beam directly into the camera’s lens.
Thus, wear non-reflective clothing. A beautiful light painting artwork can be immediately destroyed by a minuscule reflection, wasting all that hard work you put in.
See my blog article on Light Painting Fashion. The Dress Code!
How to Do Light Painting Photography: Light Painting Ideas
It isn’t hard to master light painting nor is it easy. Regardless, the results are always unique and can be breathtaking. Whether you’re setting up your first light painting or looking to improve your next shot, here are the critical light painting ideas to help you create amazing shots.

Make an Effective Action Plan
All successful businesses use actions plans for each and every activity they pursue. You may not plan a light photoshoot as a business, but that doesn’t mean you shouldn’t approach it professionally. And contrary to popular belief, professionalism does not kill creativity! If anything, it enhances it.
An action plan will help you clear out all the steps needed to paint gorgeously with light. Starting from choosing lights, choosing specific shutter times, number of people to be involved – everything should be inserted in your action plan. Make sure to write it down in a step-by-step procedure to make it easy for you to follow during the day of the shoot.
Yet again I want to point out for you to have fun and don’t force a procedure onto you that is not meant for you. Find your own structured way that is also safe at night.
Choose a Dark Location
Start in the dark! To make it easy the golden rule of light painting photography is choosing a location that is dark. This could be inside a dark room, on the street during the evening (with no street lamps nearby), or anywhere where there isn’t enough light to overpower the light paint.
There isn’t any alternative to this because a brightly lit environment will not create the dark canvas needed for you to paint with light. It’ll only overpower your light sources and also create harsh exposures in the frame as you’ll be using long shutter speeds.
Your sweet spot for Light Painting is a cross-function of your ambient light and the time you expose your sensor. This means you can still light paint if your Light Source is bright enough to outshine the ambient light and you move fast. So if unsure just give it a try and see if you get stronger lights. You will need to find your sweet stop where you feel comfortable.
The most predictable scenario for light painting is total darkness. Then you can pretty much have 20-30min Light Painting exposures. That’s because there is so little ambient light, giving you so nice stable conditions.
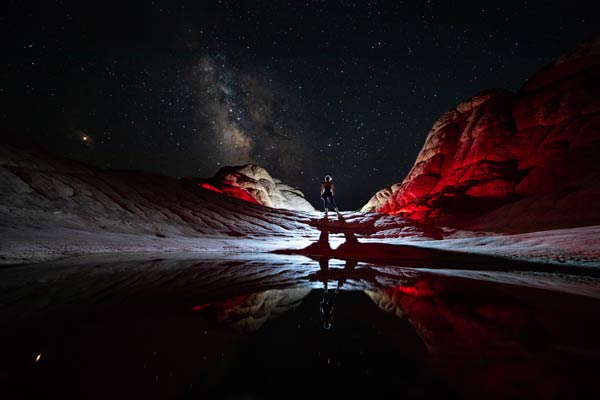
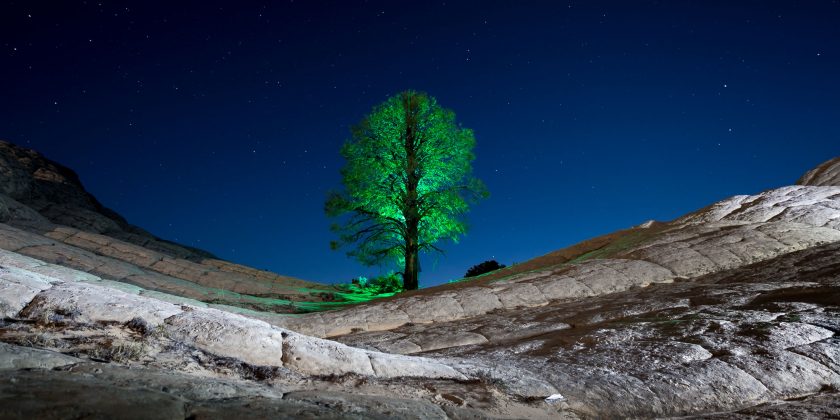
(The above image was taken in Arizona in the middle of nowhere. The Milkyway shows perfectly, visible even for the human eye without an effort. Perfect spot)
For extra long exposures, the only factor that now works against you is the heating of the sensor. The longer you expose your sensor will start warming up (no problem in Winter at the arctic circle), which results in pixel burning. The image will have sprinkles of burned pixels that you may have to clean up in Photoshop if you need it for a print.
Rehearse Before Shooting – Practice is everything
Light painting photography is a delicate art, and it requires careful planning to create a mesmerizing shot. In most cases, light photographers rehearse before every major shoot. Some people relate to this art form as Light Art Performace Photography – in short LAPP. As the name suggests this entails performing a few moves like a Katana for some martial arts, but instead of having a sword in your hand you will carry the light around. Follow the same path a few times and you become faster and more precise.
The masters in their field excel because they know that having a strong concept with a well-planned photo shoot is the key to great success. The better you plan your “performance” the faster you can execute it and the more precise your moves will work out.
Before you start shooting, you need to do a walkthrough and decide what you want to capture. If you’re serving clients, you should already discuss this so that everything is clear. This is also very important from a safety aspect. You need to walk through your scene and check for potentially hazardous obstacles.
There is no doubt that most photographers have been inspired by a few basic photography concepts before embarking on a photo shoot. And rehearsing is one of them.
Plan and be safe when you start moving around.
Important Notice: For every practice, run make sure the camera is running. This will be your feedback loop where you have been and what, and when and where you will need to improve. Where did you forget to place the light, or where do you have to set the light from not to be seen by the camera. Often I would find treasures in the test runs. The best photos can feel like an accident but on the screen, you find a surprise. Important is also to see your learning curve. Go and look back at your first trails and see what was good and what can be improved.

Try Different Lighting Techniques
Don’t limit yourself to one technique. If you’ve mastered one, move to another one. Light painting is similar to painting on a canvas – there are no limits to the brushes, colors, and combinations that you can use.
Some people like to use twisted light tubes and bulbs of varying shapes. Twisted, circular, linear – there are endless options to the kinds of lights that you can find. Certain photographers even employ technology like drones to get cool drone light painting effects!
See some drone Light Paintings.
As discussed before, originators and innovators come out from trying something new. Don’t be afraid to be one of them! Find different Light Tools and start playing.
Color-Effect Gels
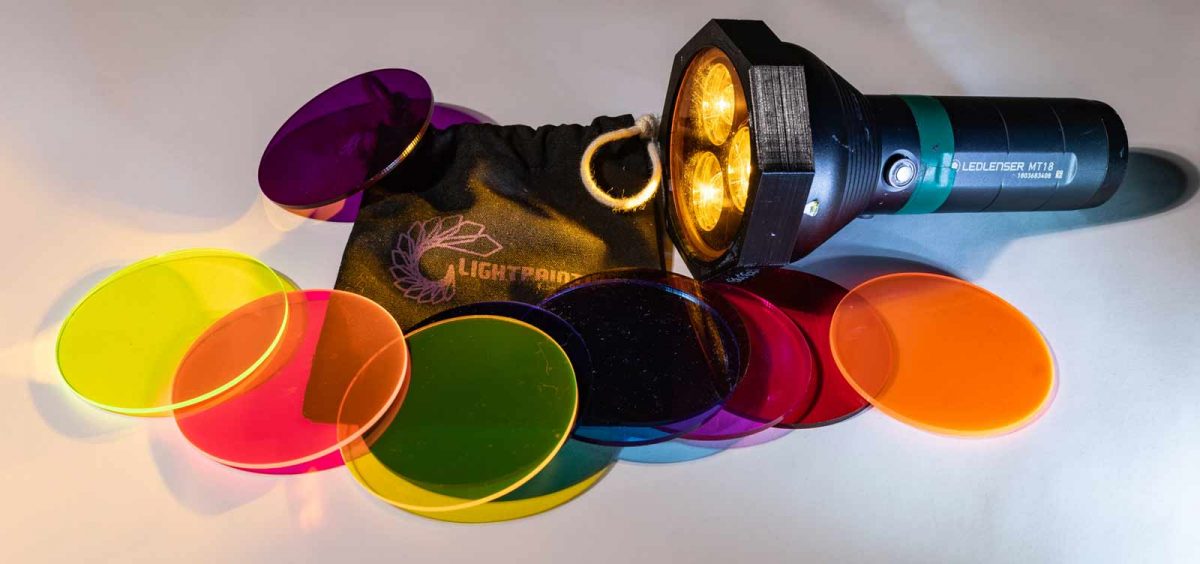
A color gel is a translucent colored substance that covers your light source and alters the tone of the image you’re shooting. They are useful for altering the color temperature of the light you’re playing with.
You may purchase color gels online or even make your own out of colorful plastic pieces. Use them if you want to achieve certain effects, but they won’t be required every time. Some use colors very methodically and think of an entire color concept for their shoot. Think of the color pallet and what works as a combination, then choose your gels accordingly.
Personally, I am the more spontaneously choosing type. So I would select my colors on the spot and experiment with what works for me. Over the years I started to use fewer and fewer colors. I try to make it less colorful. It seems even more difficult to make it POP!
You can get some filters for Flashlight just like for Lenses almost anywhere. I have some at LightPaintingParadise.

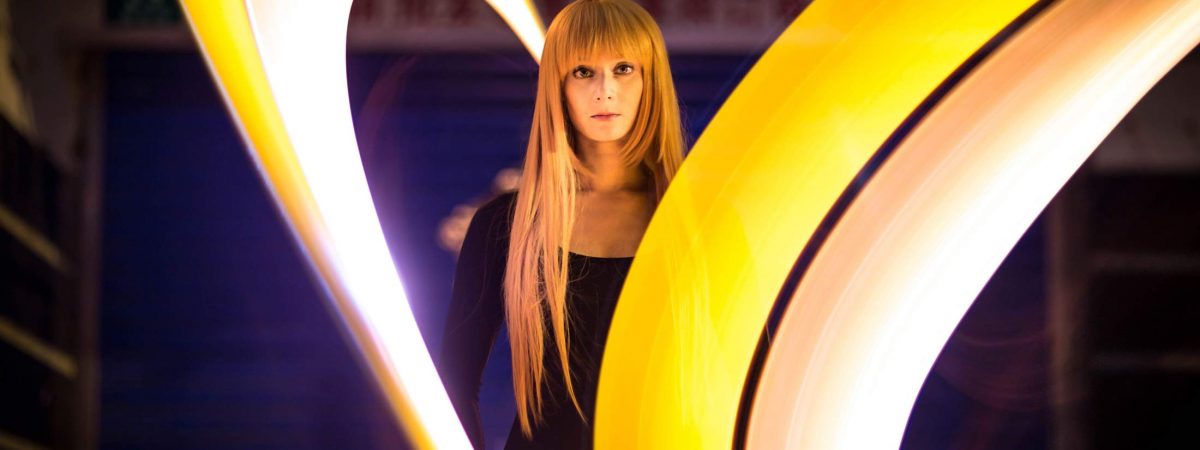
Hire a Model for Shoot?
When you start please ask your friends first. They will love it I promise you that. Once you advance and get some experience and by the time you are fully obsessed with this technique then move on. 95% of all the people you find in my images are no professional models. Yet for some shoots, it was super helpful to have someone very experienced in posing.
It’s true that as a photographer, it’s important to break camera shyness, especially if you’re working commercially. But that doesn’t necessarily mean you have to be a model. What if your light painting photography shoot requires an actor, dancer, budding professional athlete, or someone with staggering good looks?
Hiring a model before shooting can make all the difference in how you approach your shoot and what you get out of it.
A top model isn’t just good-looking. There are several important things to consider when hiring a model: attitude, look, and experience. Hiring a model before shooting is crucial because he/she gets into your creative flow, brings along his/her own ideas, and gives you the best input about stylizing the shoot.
For Light Painting the most important skill in a model is not her moving around from pose to pose! Here it is a different world. A professional model might even get agitated because it goes against everything he or she has learned. Discuss that with her or him before. Most of the time it is about holding a position or moving slowly.
- It’s different between wanting to hire a model, and hiring a model for an existing project. You should be aware of which scenario you’re in.
- One is someone who has never worked with models before and wants to try it out. The other is someone who has worked with models in the past and knows exactly what he or she wants.
- Being aware of this will help you make this investment actually fruitful.
Modeling agencies can be great at providing you with professional models. Most of the time these models are experienced professionals who know how to pose and bring a certain authenticity to any shoot.
In Europe, there is one Website that I have used a few times called ModelKartei. Go check it out it’s simple and it’s a great starting point.
Must have:
If you are going to work with a model you should always make sure you both sign a Model Release Form. It brings order to your work and brings the models and your expectation in alignment. You should speak about what you going to use the images for and how the model wants to be named alongside many other things. It brings you some certainty that you can use the images.
Same accounts if you shout in a known location. Some will require a Property Release Form. This is required when the owner wants to keep its right protected and may charge you to use a hotel or abandoned factory or anything like that.
Twist the Tubes
If you are still shy, try something that does not require anyone else looking over your shoulder or asking is it done yet. Something in no need of a model.
One of the first techniques that I started with trying were tubes. You can start by taking one from kids’ toys and swinging in mid-air and then you can build sophisticated tools later. Twisting two tubes with different lights together creates a wonderful effect. A stroboscopic mode can be used on one tube while the continuous mode is used on the other.
To start with Tubes you can watch my video on which ones and how to use them here.
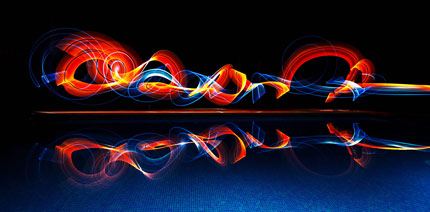
You are the artist you have all the creative space to make the image yours. Do not feel limited by the shapes you can and should create. Start with what you like then bother what your audience likes. Take for instance two tubes and use them in the same rotational axis. To make this easier, clamps can be used to secure the tubes. They are then rotated such that no pipe covers the other and they are lying next to each other, creating a dramatic light painting effect.
There is an entire section on Tube Light Painting.
Use Different Angles
Paint light from a variety of perspectives. Try painting from the side or above the subject to bring out different textures instead of shining a light directly at it.
Add dimension and complexity to the surface by shining a light source at ground level. This effect works particularly well in grassy regions. But you’re not limited to that. You can try out different angles no matter what your surface and subject are.
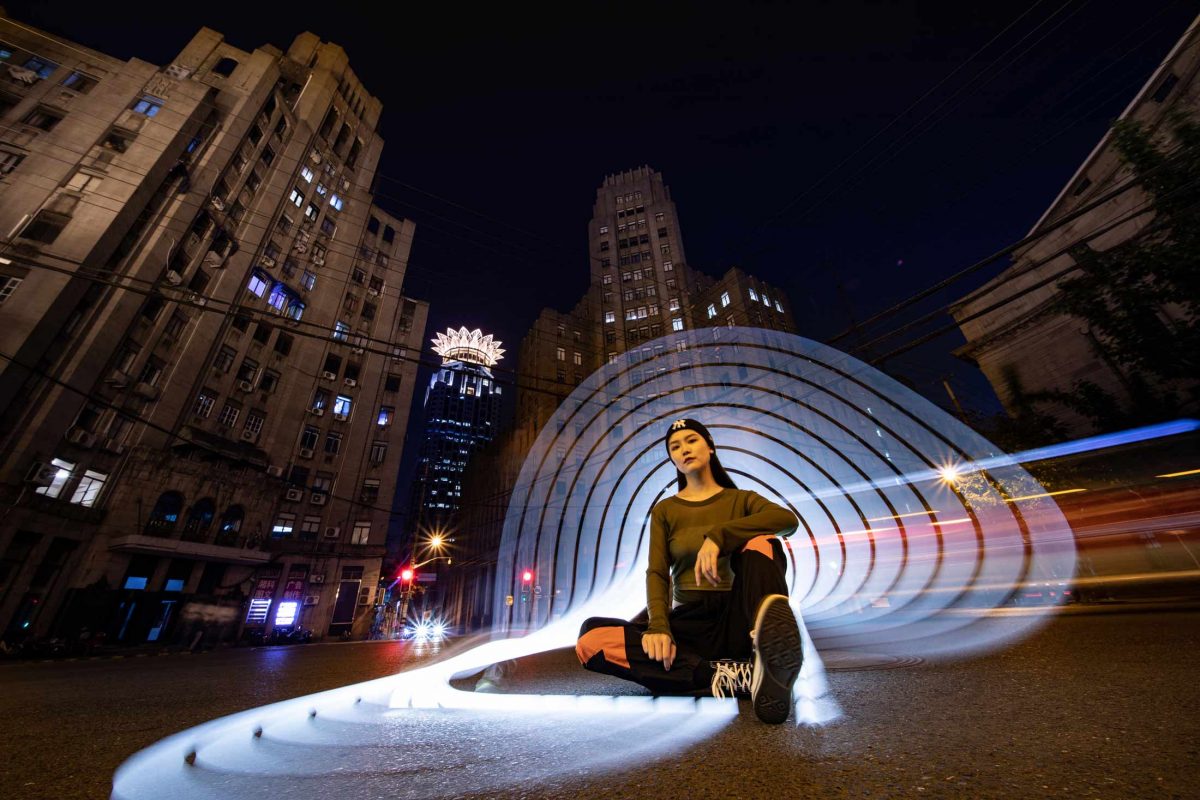
With a wide angle I often use a very low vantage point so I can play with distorsions in a purposeful way. Make it Pop!
Vary the Exposure Times
The rule of thumb is that the longer the exposure time, the brighter your Light Painting will appear. This can be used strategically to create a heavy sense of darkness in an image by varying the exposure times. Be brave to experiment! Consider your background and think about how much you want it to be seen. It is your decision your composition. If you consider it to be seen leaving the lens open for a while at the end of your run.
Do keep in mind that your paint shouldn’t overpower any subjects or focal points in your frame. Composition is the key to any genre of photography, and while light painting is all about creativity – it shouldn’t detract from photographic composition.
Start to remember the places where you have been with your light tool. Don’t go to the same place over and over. That will burn the areas faster. If that’s what you want fine. It can be a willing choice technique like creating a white backdrop for your model. Step by step experiment with that.
As mentioned before your limiting factor will be mostly the ambient light or if it is actually pitch black the overheating of your sensor. So some people have done many hours of exposure time. My longest exposure was some 21 minutes long, I think.
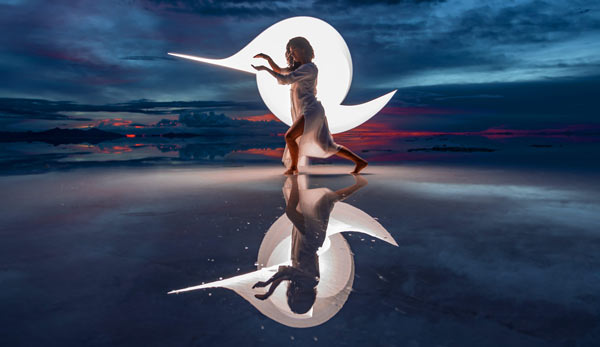
Here you can see that the Tube move burned on the top. It’s almost too much but not too bad. The reflection looks fine. If I had a choice I would have had a little less light. Maybe a lower ISO, softer light, or a shorter Exposure time.
Try all the different Night Photography Techniques
Did you know that photographers can get two completely different images of the same scene not just considering a different vantage point but different settings? The night has tremendous effects on how the same photo turns out during the day.
Night photography techniques like shooting in bulb mode, shooting in RAW, lowering the aperture, and pointing the flash at specific portions in the frame can enhance the end result of your light painting.
Good cameras allow photographers the ability to produce amazing results without the need for other equipment. So do ensure that your camera is good at low-light situations, preferably mirrorless cameras.
For that, I always shoot with my camera recording a JPG and a RAW file. Afterward, I can potentially take down the highlights if it looks too bright. It’s almost like I take down the Exposure time afterward. That’s totally fine. I use minimal Lightroom adjustments but I never add any features or crazy layering or such things. For me, that is not exactly LightPainters Ethics. In the end when you have a customer demanding that go for it when it is work-related.
Texture on Different Surfaces
The effects of different surfaces reflecting light in so many ways are heavily underestimated but they have the power to influence photography tremendously depending on from where and at what angle the light is directed.
Rough surfaces, such as concrete and wood, absorb more light and can produce different effects. But present wonderful features in Night Photography because they can provide the most exciting texture for an image. Translucent materials such as linen can filter your light source in creative ways as well. Though we talked about wearing non-reflective clothing, reflective materials such as metal, glass, and mirrors may produce unexpected but pleasing results.
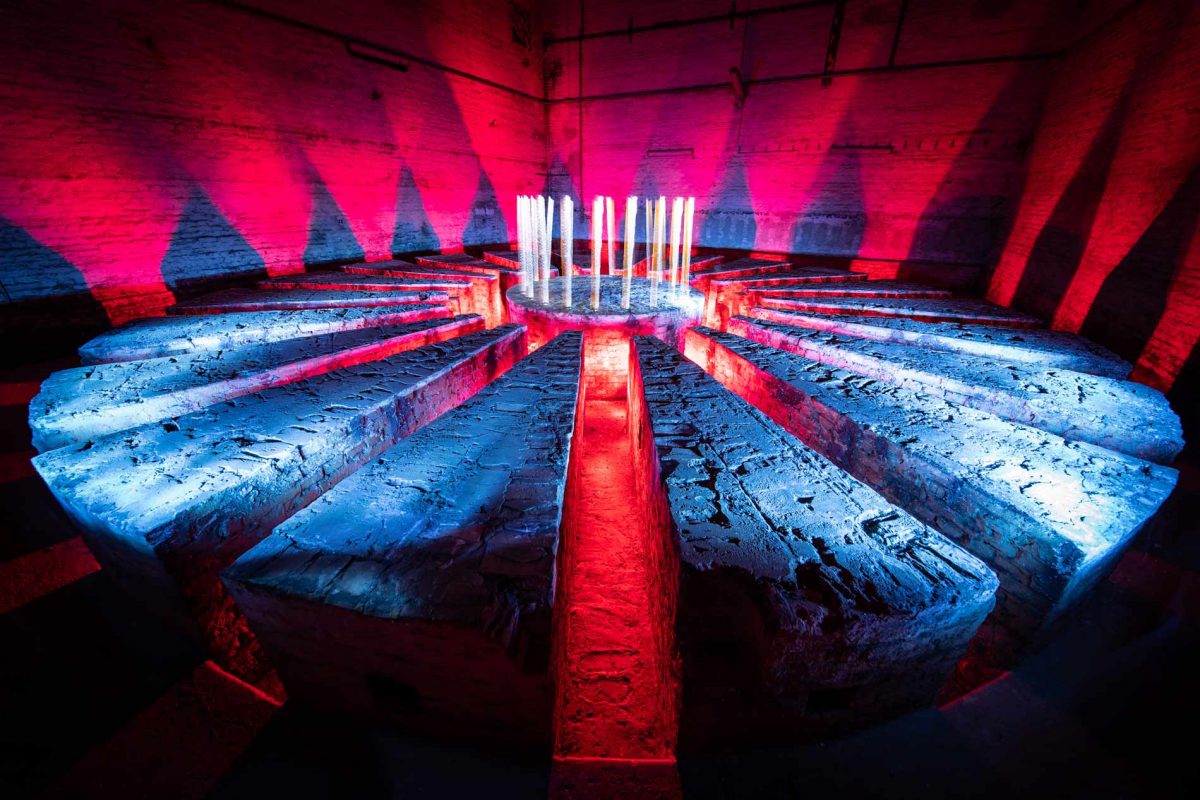
The different surfaces in your scene will result in different lighting times because of the different reflective characteristics. Darker surfaces will require you to put more light on them. Careful when your model wears a white dress. You will need to shed the light on her very briefly.
Thus, experiment with different surfaces – you’ll be able to know which one you prefer only when you do. The textures of a surface can become a fantastic feature in your images. There is another blog article just on the topic. How to create dramatic textures in your Light Painting.
Push Yourself to Think Outside the Box
L. Ibbetson employed oxy-hydrogen light (also known as limelight) to photograph microscopic objects in 1839; he took a daguerreotype in five minutes that he said would have taken twenty-five minutes in regular daylight.
This may have been the birth of light photography, which was only possible after that he pushed himself to think out of the ordinary.
You don’t have to be an originator of a new technique but always try to think outside the common convention. Light painting artists like Chris Thompson, Mart Barras, Sven Gerard, Eric Pare, or Dennis Smith can serve as an inspiration to utilize light painting photographs in unconventional ways. Keep practicing new ideas, and who knows, you might end up being an inventor yourself! Create your style!
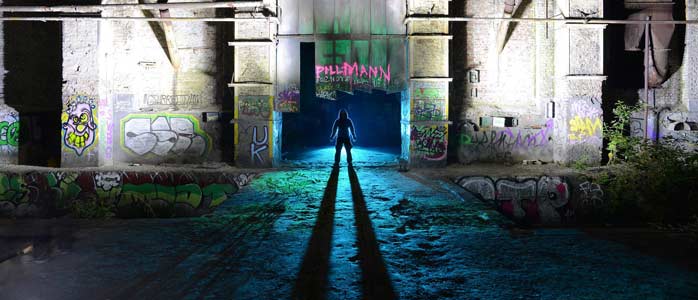
Stay Calm
Photography is all about capturing the right moment and there’s nothing more exciting than to capture something very rare.
Staying calm in photography is not only about trying to be cool all the time when you’re in front of your camera. It’s really more about developing a philosophy and approach to photography that allows you to work through and come out with the best images possible.
To make a great shot you should be calm and composed, not overly excited and rushing the photo, but at the same time, be fast enough to react in case something exciting happens.
Since you’ll be planning everything to get your light painting come to life, reacting fast isn’t a major concern. But in case things aren’t working out, staying calm and solving them bit by bit is the goal.
Most importantly it’s about safety. If you run at night and you miss a dip in the floor you may stumble and get hurt. So be safe at all times and use a headlamp when moving around. Have a friend cover the lens while you move from one place to another and you will be fine. Your image will not be exposed while lens capping till you are at your next lighting point.
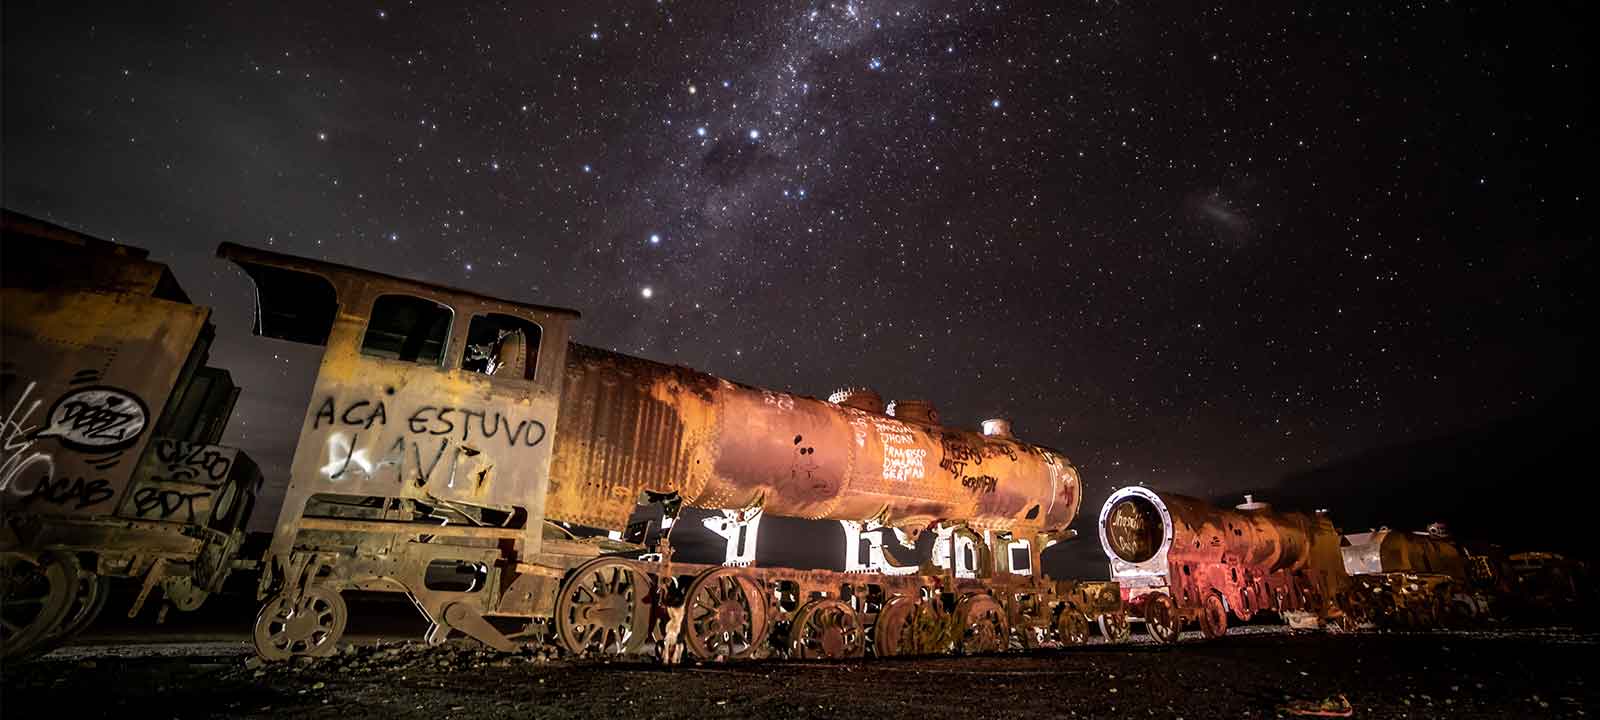
Have a closer look at this image. Since I was moving around the trains calmly and not hectic the dog showed interest in what I was doing and started modeling. He was sitting down perfectly following the golden rule.
Stay calm and you may be up for a surprise!
Quick Light Painting Checklist for Beginners:
[ ] Got your Camera?
[ ] Extra Battery?
[ ] Right Lens for the subject?
[ ] Tripod?
[ ] Remote Trigger | Cable Control
[ ] Something to cover the lens?
[ ] Headlamp?
[ ] Dark clothes?
[ ] Flashlights?
[ ] Do you have some Light tools?
[ ] Do you have some Ideas or Inspiration?
If you check all of these we can certainly get started. Go set up and let us play.
Ok, let us start your first Light Painting.
Put your camera on a tripod and focus where your subject will be. To do so activate the live view and put some light on where your main subject will be.
What kind of setting should you start with?
There are no best camera settings for light painting. When you start Light Painting you should have your Noise Reduction and Image stabilization deactivated (otherwise it will take twice as long, because it takes a reference image internally).
Let’s get started already here.
Step 1: First Camera settings to start with
So I would argue you have a rough understanding and start with something like F8 on your lens ISO 100 on your camera in BULB mode and let’s go.
- Camera Mode – Shoot in BULB or Manual mode. Click to start and click to end with your remote (BULB)
- ISO – Use a low ISO, such as 100 – If it stays too dark move slower or increase your ISO to something comfortable. For some cameras, you can go up to 2500 without getting too much noise in your pictures.
- Aperture – Start easy with f/8 or f/10. This is more a decision related to your desired depth of field. So go F2 if you want a nice Bokeh but you need to be moving much faster.
- Shutter speed – Set your shutter speed to the time it needs for you to finish your “performance”
How to focus in the dark or at night?
Step 2: Make sure you can set the focus on your subject properly. If it is already dark, place a flashlight in a way that the area where your subject is located gets some light. Then activate the live view on your camera and use manual focus to focus exactly where you want the image to be sharp. For that, I also created a quick tutorial.
Start Light Painting
Step 3:
Start Trigger your camera and start shedding light
A) Begin a test series where you bring light to the environment of your scene. This way you get a feeling of how much time you will have to perform your light drawings or effects that you would like to do. Keep in mind you can gain more time if you think you need by lowering the ISO or moving up in the F-Stop. If really necessary I have been using F32 in a late afternoon session.
If you are still unsure what this means go into detail and visit my blog article on the topic itself: Background Lighting Procedure
Here you will find a more detailed step-by-step procedure.
B) Now you know how much time you have you can add your features. Light up your model or draw a sculpture in mid-air with your light tools and see what develops.
Stop your trigger and you hopefully have your first photographic smile on your face.
Repeat the process in these two steps until you see something you like. Don’t forget to have fun.
In the end, I offer you another way to learn and take in the information in form of a tutorial video. You will find a practical example on which I show what’s happening along the way from start to result.
Für die deutsch sprechenden gibt es hier auch noch ein Video.
Important to know!
It would not be a Beginners Guide without some extra tips and tricks before I let you go play.
Remember:
1. When you start lighting the scene and the background, you have to make sure you keep moving around while hiding the light source you are using. You can do that by putting your body in between the light and the camera. Never really slow down or stand still, otherwise, you imprint your body shape (which can again become a feature if you do it intentionally)
2. When you start scribbling some letters in the air or create your first orb or light shapes make sure that in opposite to lighting your environment you do NOT want to be in between the light painting tool and the camera.
3. When putting light behind a model and lighting her face and body make sure that the model does not move at all in between these two actions. If that happens some unwanted shadowing can appear in the hair or face or clothes. That is what happens when your model is no longer in the same space as before and you keep filling the same space with light.
Extra: always bring some tape. It’s a Light Saver I mean Live Saver
You can attach any flashlight with fancy mechanics or simply with tape. How long will you use it? Not that long. So your tape just has to survive the shooting.
Ethics & Legal stuff:
Before you publish your images on the web or print,
please remember how to properly credit your images when others have been involved. It is important to say who is in the picture. Refer to the person as stated in the Model-Release. A model may only want to be referred by their artist name. Then share who was on the Camera Trigger and who was performing the with light tools.
If you are very nice and want to build a community make sure you refer to the art or artist that inspired you to come up with your work. This is creating an appreciative way to advance the art form rather than just copying. Thats what it may look like to some. Share how you achieved your result and people will share their way of doing so.
For me, it is very important that I get not into legal trouble with anyone, so I always trigger my Light Paintings myself, if necessary with the remote trigger. Because technically the one pressing the trigger holds the intellectual property rights in Germany. It is not the person who developed the concept or choreographed the Light Performance nor who actually did it.
For me in Light Painting, the Intellectual Property should belong to the artist who holds the idea of the concept and coordinates the shoot. But the law is different and you should also remember that.

FAQs of Light Painting Photography
Is light painting an art form?
Yes, light painting is certainly an art form and a growing one! Have a look at the community at LightPainters.com Find inspiration and see who is around you. It has become a movement.
Can I use a flashlight for photography?
You can and should use flashlights for Light Painting photography. But for light painting, you should be careful not to overpower the light paints with the flashlights. It will be a balancing act between your setting and how you use your flashlights. You may have to move faster or slower or change your settings. You can get a little introduction on the topic in my blog article about flashlights. You find more than just my opinion on the topic.
How do I shoot light trails on my phone?
To capture light trails on your phone, you will require camera applications that allow you to adjust the shutter speed, ISO, and aperture independently. Phones around the $200+ range will do just fine, but below that price, it may not have these functionalities. It also often comes down to the apps that you get for your phone.
How do I make a moving picture of light?
You can capture moving pictures of lights by employing the light trail techniques discussed in this article. There are a few attempts of software solutions know that allow for video capturing and light painting combined. One commercially available solution is provided by Eric Pare or Marcel Panne from Licht Factor. Check these out on Youtube.
Who invented light painting?
L. Ibbetson was one of the first ones to take a photograph based on artificial light. As for light painting photography, it’s hard to almost impossible to name one single originator! Whoever claims that would be huge … Don’t take them seriously.
Conclusion – Begin your Light Painting journey now!
Painting with light is one of the most stunning ways to capture an image or just have some fun. It’s one of those techniques that may seem hard at first, but once you figure it out, it consumes you. It consumes you in a way where you can’t stop because it’s so addicting to see how small changes can make the biggest impact on the final shot.
We hope this article has helped you begin your light painting journey, and if it has, don’t forget to share!
PS: Stay safe and if you can bring along a friend to stay safe at night.
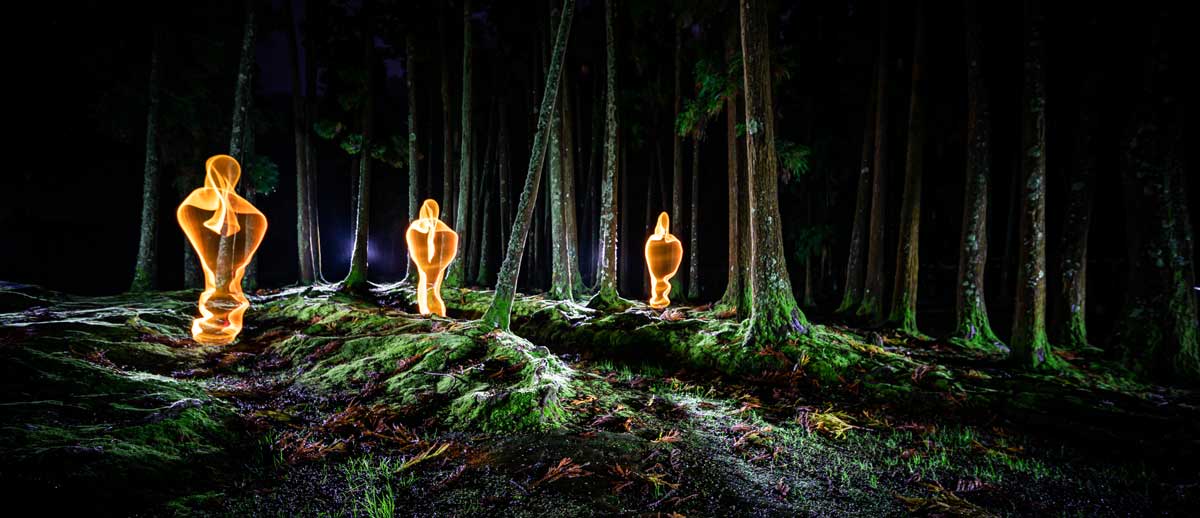
For the Beginners Guide to Light Painting, I got some help from a native English Speaker, Writer, and eCommerce specialist Ashique Rahman. He got in contact with me being fascinated by the topic. As several people approached me in the past year about a beginners guide and tutorial video. Took me a while but then I could not resist saying yes to a joint effort to make it a co-authored article. With his mind coming from the beginner’s side it is so much easier to build up the article in a way it benefits the first-time reader. So we created this article in a joint effort together.
Thank you Ashique for this productive collaboration.

Co-Author Bio
Ashique Rahman
Photographer & eCommerce specialist Ashique Rahman is a devoted researcher and writer. He has been publishing write-ups on e-commerce business, e-business updates, tips, and strategies, solutions to adjust to the trendy business strategies to improve their page rank, traffic, conversion rate, and SEO activities. Follow him on: Facebook, Twitter, Linkedin profile.

Author Bio
Gunnar Heilmann
By using light as an instrument, Gunnar’s reinterpretation of motion in space is turning ephemeral choreographies into drawings and transforming imperceptible moments into visual stories. His methods appropriate tools such as fiber optics, fire, and torches, juxtaposing natural and artificial elements by manipulating the aperture during the shot. Working in the space of Light Painting for more than 10 years he is known as an educator and networker sharing his knowledge.


